Extending Titanium Mobile Application from Native Coding.
This blog is for iOS and Soon Android version will also be here.
Hi all this blog is to explain you something which most of the people looking for months.
1: Create a Titanium Application using titanium and decorate it with your logic as you want.
2: create a build for iOS simulator and that will launch app in iOS Simulator.
3: Close the simulator Go back to your code and put the Titanium Native Extension(com.ti.extnd) module in your code, which is having some limited functionality right now.(grab it from GitHub)
(https://github.com/ashishnigam/Titanium/tree/master/Module%20Work/Extention%20Module).
4: Use this module from where you want to start Native Coding.
example:
var win = Ti.UI.createWindow({
title:title,
backgroundColor:'white'
});
var button = Ti.UI.createButton({
height:44,
width:200,
title:"Native Extension Point",
top:20
});
win.add(button);
var extndModule = require("com.ti.extnd"); // require Extension module required here
button.addEventListener('click', function() {
extndModule.example("ashishClass"); //Provide the Starting point Native Class name
});
5: Go Back to Build phase and build again.
6: Go inside your App build directory and open the build Xcode Project in Xcode.
Here is how it looks like...
In this Pic ashishClass.h and ashishClass.m are Native Class, so first when you open in Xcode it will opened without these two Classes.
7: now open the menu in your project and add the Native classes.
8: click on "Add Files to "testConcept" and add the Native Classes as per your requirement.
9: Add the following code in your Native Class.. as a starting point for this test module.
+(ashishClass*)sharedInstanceOfMyClass{
NSLog(@" ashishClass ");
@synchronized(self) {
if (obj == nil) {
[[self alloc] init]; // assignment not done here
}
}
//[self alertFunction:nil];
return nil;
}
- (id) init
{
self = [super init];
if(self != nil)
{
[self alertFunction:nil];
}
return self;
}
-(void)alertFunction:(id)args
{
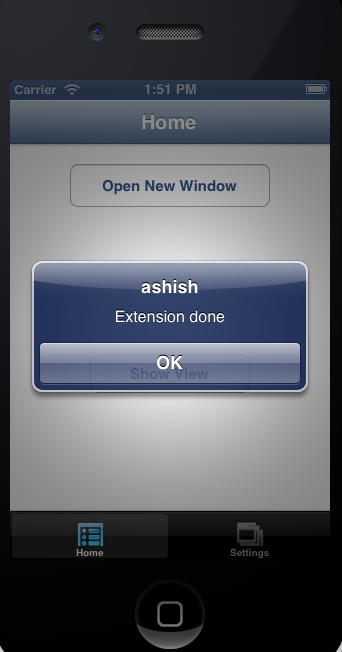
UIAlertView *alert = [[UIAlertView alloc] initWithTitle:@"ashish" message:@"Extension done" delegate:nil cancelButtonTitle:@"OK" otherButtonTitles: nil];
[alert show];
}
after That when you run your project from xcode, you will receive call in Native Class and Its doen to get a starting point here.
10: See the Images from Titanium UI and functionality.
11: Here Images After adding Native Code.

12: Have a Nice day... See the Live Video Here.
Drop Box::
https://www.dropbox.com/s/ms5qxc3dmvrmr0l/NativeExtention%20-%20Broadband.m4v
You Tube::
http://www.youtube.com/watch?v=ZPKHykWHMdM&feature=youtu.be
GitHub Module:: https://github.com/ashishnigam/Titanium/tree/master/Module%20Work/Extention%20Module


Hi Ashish,
ReplyDeleteIts nice tutorial.Its very good beginer like me.
var extndModule = require("com.ti.extnd"); // require Extension module required here
button.addEventListener('click', function() {
extndModule.example("ashishClass"); //Provide the Starting point Native Class name
});
Here extendModule is a variable.So what is example here?
HI, example is the method name which creates staring point class and map it with your native code.
ReplyDeletethat's why you have to provide native class name.
Hi Ashish, Can you also make a post for android? That how to use a native code in Titanium as a module in Titanium App.
ReplyDeleteThis comment has been removed by the author.
ReplyDeleteDidn't work for me, can you provide the full source of the example?
ReplyDeleteHi Samuele, you can find source code and working sample at:
Deletehttps://github.com/ashishnigam/Team_Dev_Work/tree/master/CrossMobile/Appc_Titanium/TiExtension%20work