Module Development for Android
(Using Titanium Version 3.2)
As Appcelerator has already documented well in the android module development part,
So here in this post i am going to write very practical approach which may help you guys for common module initialisation and linking issues.
There are two approaches for module development:
1: Using Terminal and the Eclipse for development and testing.
2: Using Titanium IDE for development, testing and deployment.
Both got their own benefit and drawbacks.
Here i am going to give Module development demo using eclipse, as except module creation in terminal all other things are same.
Terminal Command to create Module:
titanium320.py create --platform=android --type=module --name=<module name> --id=<module.id.reverseDomain> --android=<andorid sdk path>
Explanation:
titanium320.py : is titanium.py (Titanium SDK version not CLI version) alias in terminal for mac and reference environment variable name in Windows.
name: module name which suits you.
id: module is as per need.
android: Android SDK path.
Complete Sample command in my machine:
titanium320.py create --platform=android --type=module --name=calc --id=nigam.ashish.calc --android=/Applications/adt_bundle_mac/sdk
This will create a module in the directory you are currently in, in the terminal.
Module Directory structure will look something like this:

The Import the same in Eclipse where after import it should look something like this:

After that just check your build.properties file, it must contain all these properties for proper module build:
titanium.platform=/Users/ashish.nigam/Library/Application Support/Titanium/mobilesdk/osx/3.2.0.GA/android
android.platform=/Applications/adt_bundle_mac/sdk/platforms/android-10
google.apis=/Applications/adt_bundle_mac/sdk/add-ons/addon-google_apis-google-10
android.ndk=/Applications/android_ndk
Now all set, you are ready to build your first module.
Now right click on your build.xml file and go to "Run As" option and click on Ant Build first option.
Result: It will build the module and create module zip in the module source directory, which can be used in titanium application.
Testing on device or emulator:
Right click on your build.xml file and go to "Run As" option and click on Ant Build second option.
it will open a window where on little bit downside scroll, you see a screen like this:
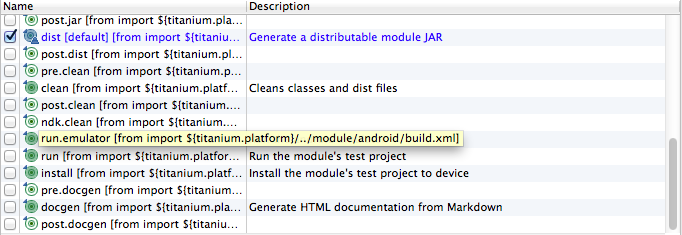
Now you can choose to run on emulator or device:

This will be your screen after selection you can choose both as well but generally not required.
After that hit enter or click ok and it will build your module, create a zip in the module source directory and launch it on device or emulator.
How to use the build zip in Titanium App:
1: Launch Titanium.
2: Go to Help section.
3: Install titanium Module
4: Browse your module zip file path and choose project in which you want to install.
5: Click ok and done, you are ready to use the module in your app.js.
Note: Installing module in SDK Level is not required until module is very generic and will be used in most of the projects.
For Exposing More APIs in your module rather than just simple build, you can now open CalcModule.java file and start adding methods and properties.
Remember to expose methods and properties with proper annotation:
1: @Kroll.module(name="Calc", id="nigam.ashish.calc") //for module class
2: @Kroll.method
3: @Kroll.getProperty
4: @Kroll.setProperty
5: @Kroll.proxy(creatableInModule=CalcModule.class) //for any added proxy class.
There are many more but for exposing methods and properties only these are required.
You can check out lifecycle methods and events for proxy and viewProxy on Appcelerator GitHub Page.
Life cycle methods:
Methods Demo:
View proxy for exposing view:
View or creating custom view:
Passing Parameters to methods:
These are basics about view and proxy which can be seen from github.
Adding 3rd party JARs in module:
Right Click on your project and click on build path--> configure build path --> and on libraries section add external JAR.
Browse the jar and add it to your project. Import the file in your class and start using them for module development.
Feel free to write your comment on this and any question related to android module development.